Tech Tips Archive
Replacing Your Corvette C7’s Cabin Air Filter
by Ken Uliano
As some of you may know, Barb and I have gotten another Corvette. This one is a DSOM C7 convertible. Our other Corvette is a very “user friendly” C5. By that I mean, if you wanted to, you could still tinker with it and do your own limited maintenance, if you were so inclined. Not so with the C7. But I’m a tinkerer… (Is that even a word?)… I like to see how stuff works. So, in my initial investigations with our new acquisition, I found out there were a limited amount of maintenance items I could break… err ahhh… work on. One of them being the cabin air filter.
I’m guessing if you’re like me, you’re thinking, “I’ve got a cabin air filter??? What’s a cabin air filter??? Our C5 doesn’t have a cabin air filter!!! And why do I need to change it?”. So, I looked into it. Here’s what I found…
If you don’t regularly change your cabin air filter, the filter may become clogged with dirt and debris and the efficiency of the filter and your car’s HVAC system will be compromised. The air volume into your passenger compartment will be continually reduced which will lead to the issue of foul odors inside your car. (Not to mention a perfect nesting place for those small unwanted winter invaders that we call mice.)
So, how will I know if I have to replace the filter? Here are just a few of the symptoms or clues as to the fact that it’s past time for filter replacement.
• The vehicle’s heating or cooling system starts making excessive noise.
• You can hear a whistling sound coming from the cabin air intake ducts.
• Airflow is weak, even when the heat or air conditioner is on high.
• There is a musty odor coming through the air in your vehicle.
So – Where is it???? and How do I replace it???? (You guys ask such good questions… BTW, do you know what the definition of a good question is? Well, it’s any question that makes it look like I know what I’m talking about.) …But I digress.
I’ll now use too many words and too few pictures to explain exactly what I did… but there are SOOO many great YouTube videos demonstrating the procedure and here’s a link to just one of ‘em:
How To Change 2014-2019 C7 Corvette Cabin Air Filter – Stingray Grand Sport Z06 ZR1 – YouTube
Now back to me… Here’s where it is!
Open the hood and look on the passenger side. Hidden behind the dipstick and the oil fill cap you will see this:
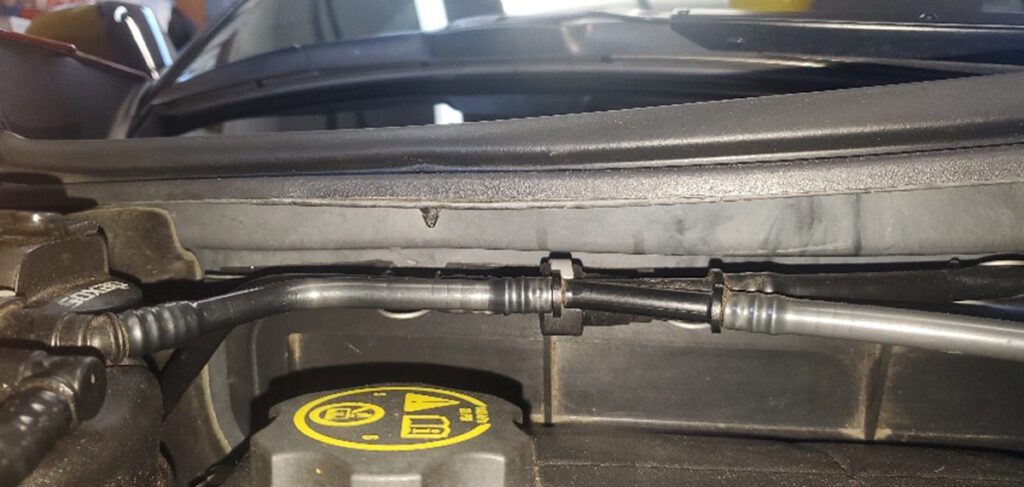
And when you move the tubes out of your way, you will see this:
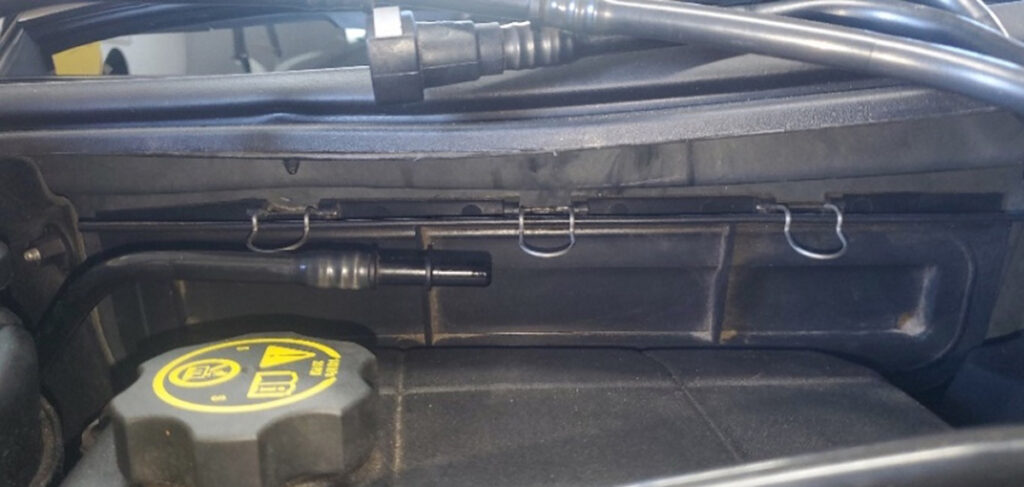
Lift the 3 wire retainers and remove the panel. The Cabin Air Filter lies behind it, sitting on a shelf:
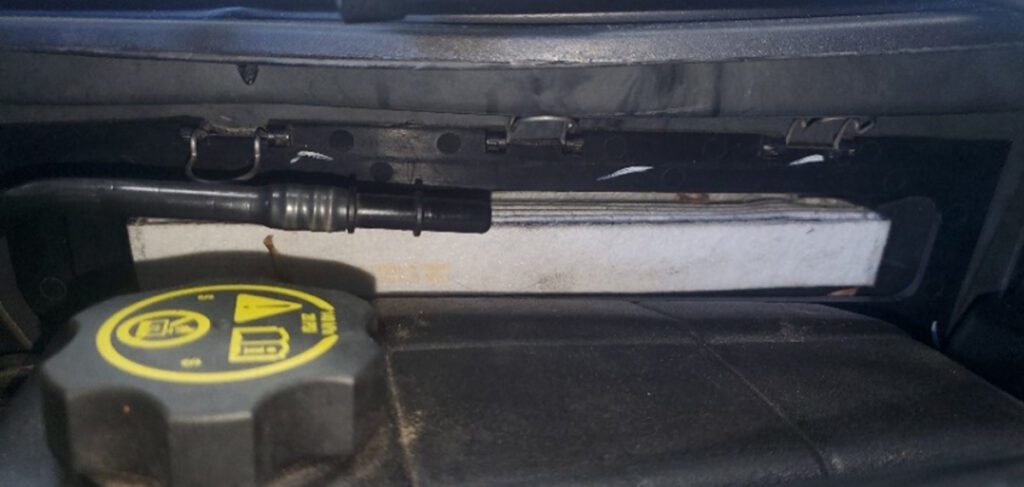
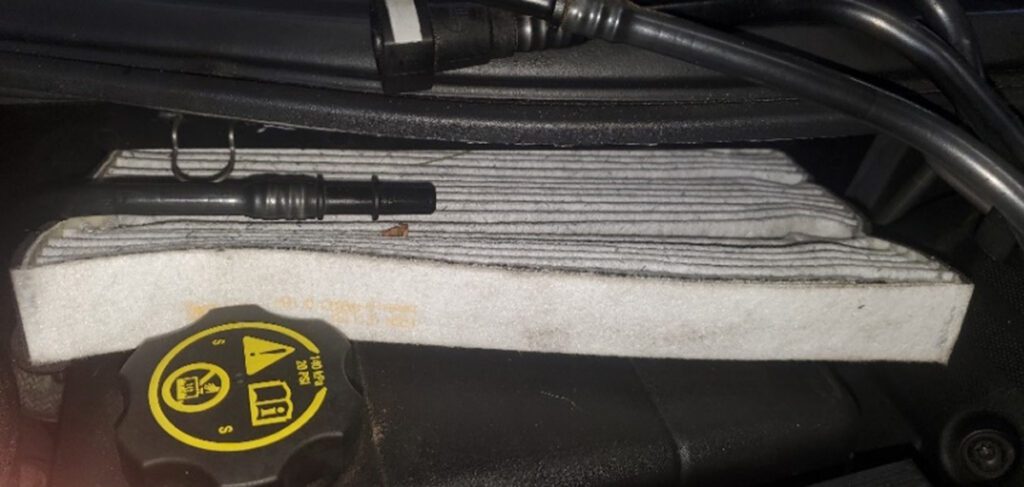
It’s a tight fit, so pull on it to slide it out like this:
Here are a couple of part numbers of very good replacement filters for your C7 Corvette:
• AC Delco GM Original Equipment Cabin Air Filter – P/N CF197
• FRAM Fresh Breeze Cabin Air Filter with Arm & Hammer Baking Soda – P/N CF11181
The replacement filter may have an ARROW which will indicate airflow direction but truthfully, it makes very little difference. Now just reverse the process, and you’re good for another year. Well, there ya have it! Let me know If I can help in any way.
And for those of you that want to get all Martha Stewartish… You might think of applying a few drops of your favorite scented oil just before sliding it back in position. Here are a few suggestions:
Balsam Fir: has a soothing and cleansing effect, so you can create an energizing, uplifting environment while getting rid of harmful bacteria, and kinda Christmas-y.
Basil: Floral, crisp scent, can be characterized as airy, vibrant, and uplifting.
Bergamot: It has a sunny, pleasant aroma that’s refreshing and rounded. It’s a wonderful choice if you suffer from anxiety when driving, and it will boost your mental alertness.
Frankincense (Cuz it’s Christmas and 1 of the 3 wise men gave it as a gift): People generally describe frankincense as balsamic, earthy, piney, woody and sweet. It can calm your mind and soul. It has wonderful effects on the memory too, so it may help you remember which turn-off to take when you’re on your way somewhere new. Not to be confused with Myrrh!
But maybe stay away from Lavender: Lavender essential oil is a proven, gentle way to fall into a relaxing sleep. But, It has been known to have antioxidant, antimicrobial, anxiolytic, anti-inflammatory, anti-nociceptive, and blah… blah… blah… blah …blah effects. SO… it’s got THAT going for it.
Helpful Hints From Bob Wadyka
Here are some links to interesting YouTube videos about C5 Corvettes. Just some nice basic stuff to know.
https://youtu.be/9lkEU45kPNc How to change oil.
https://youtu.be/dQWcZyMuFkc Replacing parking light and side marker bulbs.
Helpful Hints From Roy Master
Thanks to Bob Wadyka for reminding me to write this helpful hint for C4’s. The left turn signal quit working on my ’87 Vette last week so I figured a bulb was burned out.
I started with the left-rear bulbs with the following process:
• Removed the license plate.
• Removed the left back-up light.
• Reached in through the license plate frame with a small ratchet to remove the two screws holding the right taillight assembly. (Of course, there are two lights on the left – it’s a Corvette.)
TIPS:
• If you do this procedure, tie a string around the wrench because you will likely drop the wrench behind the bumper.
• Have band-aids ready because the space is very tight and there are rough edges.
• After removing the right taillight assembly, you can go through that hole to remove the bulb in the left taillight assembly.
Hey, I did it! I replaced both bulbs. However, @#$%$#@, the turn signals still didn’t work. Okay, now I had to replace the left-front bulb. This looked easy until I found that the bulb socket was stuck from age and there was only a very small space to get my fingers in. I don’t remember ever replacing the front bulbs in the 20+ years that I owned the car.
I removed the horn and then I managed to get my fingers in to remove the bulb socket. Hurray, the turn signals worked!
TIP:
After replacing the rear bulbs, I read that I could have turned on the emergency flashers to find out which bulb was burned out. Evidently, the bulbs work independently when using the emergency flashers.
Helpful Hints From Kurt Ryder
Be cool this summer with your C5.
Would you like to better understand how you can keep your C5 running cool during the 2022 driving season and thereafter? Well, maybe the information I am about to give may be of interest. This also applies to C4 owners in that both cars are known as “ground feeders”, meaning the air to cool the radiator/AC condenser comes off the ground/pavement up into the units to cool them. This, of course, picks up debris from the ground and may clog your radiator or AC condenser.
I own a 2004 C5 coupe. This car has the LS1 engine and 2004 is the last year of C5 production, so it has the best technology available at the time. Also, many of the bugs that caused problems for the C5 generation have been worked out. However, basic maintenance is always in order and may save you a headache or two on your next cruise.
As you well know, your engine’s radiator is a major component of your cooling system. In front of your engine radiator is your AC condenser which looks like a radiator. If you are able to look under the front of your C5 and look up, you will probably see the AC condenser and debris, such as leaves small twigs and seed pods. Refer to Pic 1.
Pic 1
Unfortunately, I have already cleaned the debris from my AC condenser but, if you have never cleaned this area, you should have some leaves, etc. to clean off. You can use compressed air to clean the area but, of course, be careful to avoid nicking any part of your condenser. You could also use a hose and nozzle to rinse out the area. This is the easy part. You’re not done yet.
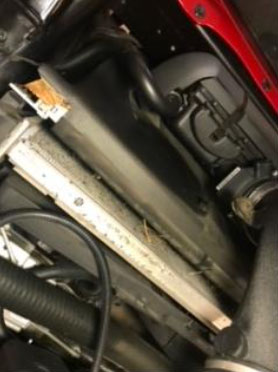
To get to the area between the engine radiator and the AC condenser, you will need to remove the air intake duct from the throttle body. See Pic 2.

Pic 2
You then need to remove the long black shroud under the air intake duct. See Pic 3.
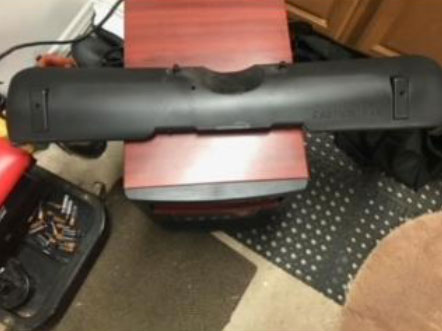
Pic 3
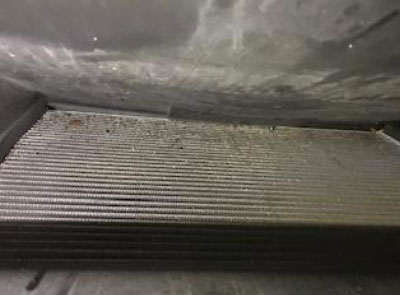
That will reveal the area between the engine radiator and the AC condenser. See Pic 4.
Pic 4
As you can see, mine has debris which seems mainly to be pine needles and some small leaves.
For those of you who are hesitant to remove parts from your Corvette, I will refer you to a YouTube video that makes it look pretty easy – How to Clean Out C5/C6 radiator, by My Corvette Life:
https://www.youtube.com/watch?v=J02kTZblkMA
If this is not something you are comfortable doing, maybe you have a friend that is good with mechanics and you can do it together. Good luck. Give me a call if you run into some problems and I can recommend a good beer: Kurt Ryder, hobosvet@gmail.com or (860) 302-3958. Send me an email first with your phone number so I recognize your number when you call.
Tech Tip: C5 Vettes – Going to the “Udder” World
by Jerry Breen
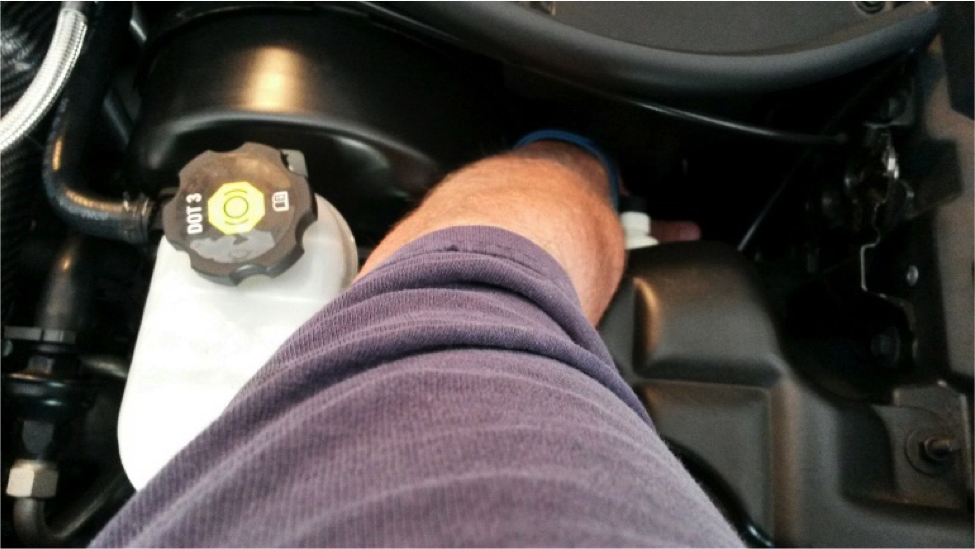
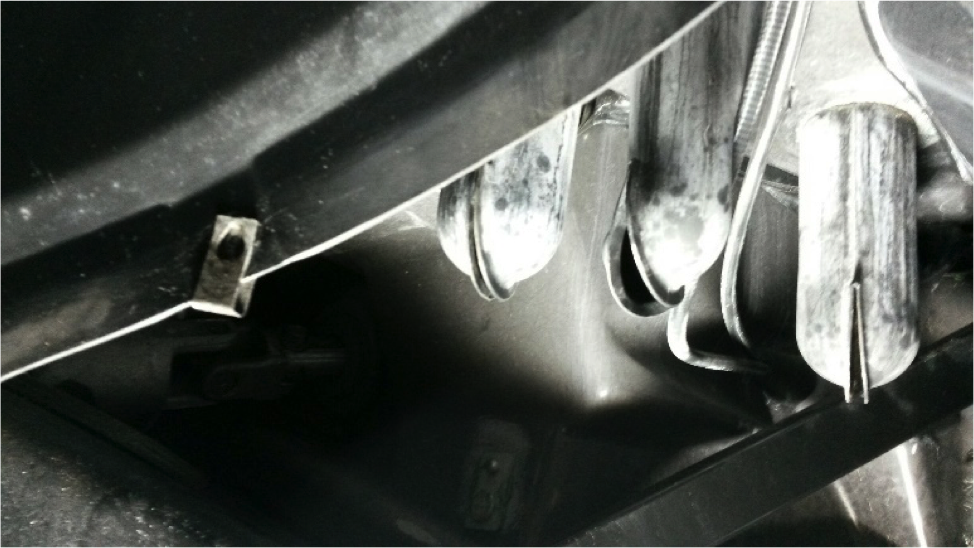
Cleaning Out Udders – Driver Side
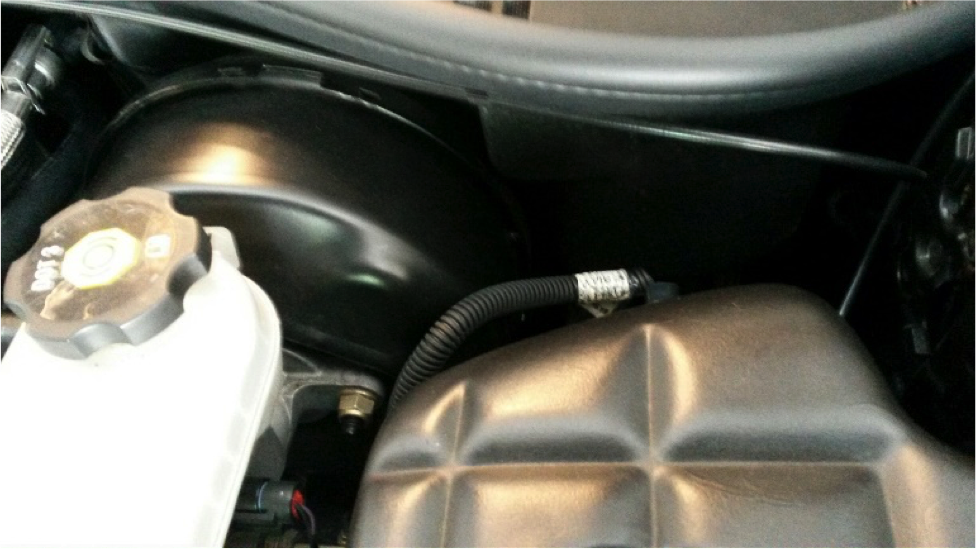
On the driver’s side of C5 Corvettes, there are three udders that can get clogged from leaves, twigs and other “crapolla”. They are easy to check and clean. Place your hand down alongside the master cylinder booster (see photo). There are three short udders, two of which are side by side. The third is behind the two. They are made of thin soft rubber. If any of them are hard, it means they have debris in them. Squeeze and check the opening (slit) of the udder for debris, which will then fall out.
 |
If the udders are clogged, rain and/or car wash water will not drain out of the scuttle tray. The bottom line is that the water build-up can cause a short in the electrical system in the windshield wiper motor. You may also get water on the inside of the car in the footwell area, wet rugs, or cause other problems.
 |
 |
**Please note** Photo with 3 udders – I removed the plastic inner fender panel only to get a good photo of the udders.
Cleaning Out Udders – Passenger Side
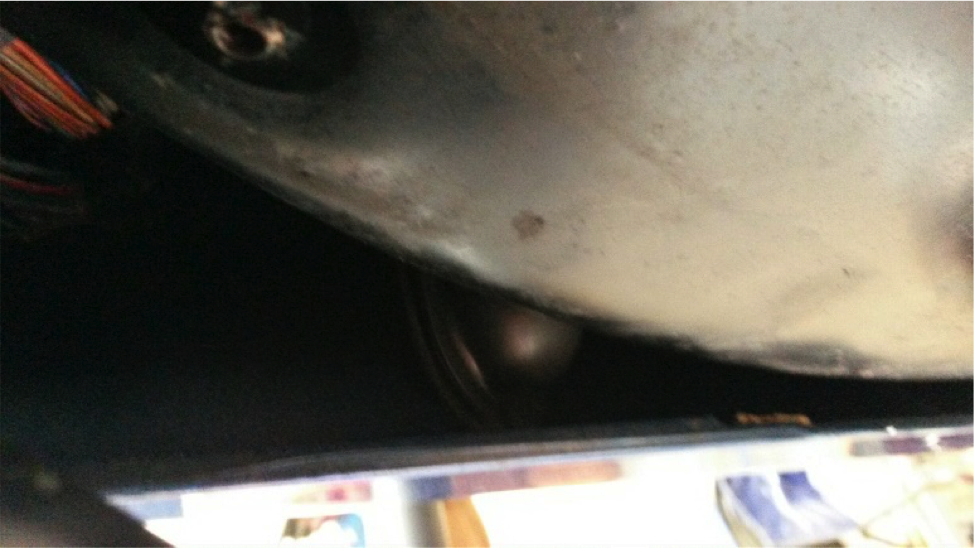
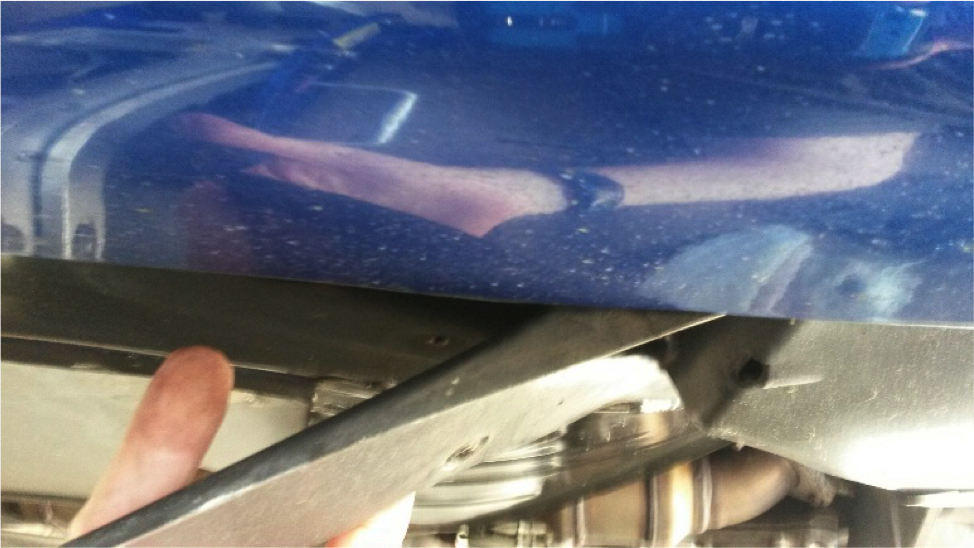
Shortcut to check the bottom of the long udder in the fender (passenger side):
At the bottom of the fender where the rocker panel is, remove three (3) black screws. The screws have a 7mm hex head.
Once the three screws are removed, pull down on the black plastic panel (bottom of fender at rocker panel, see photos below).
You can now reach the bottom of the udder opening to check for debris.
 |
 |
If you have any questions, please contact breenjerry@hotmail.com.
Tech Tip: Cleaning with Clay
Reprinted with permission of Autogeek.net.
If Detailing Clay is new to you, you might be thinking, “What is Detailing Clay and what can Detailing Clay do for my car?” The short answer is that Auto Detailing Clay removes from the paint what washing cannot. For the long answer, read on!
Auto Detailing Clay Bar is an engineered resin compound used to remove contaminants from the surface of your car’s paint, glass, fiberglass and metal. Detailing Clay can be natural or synthetic, though most manufacturers utilize synthetic clays.
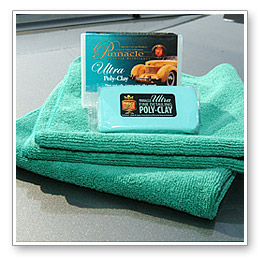
Auto Detailing Clay is similar to the stuff you played with as a kid, but the clay used for detailing is usually much more elastic, especially in the case of Pinnacle Ultra Poly Auto Detailing Clay Bar. The elasticity gives the detailing clay excellent durability as it is rolled, flattened, smashed and stretched over and over again.
Plus, Detailing Clay is designed to stand up to the kind of contaminants that your childhood clay never had to face, i.e. industrial fallout, rail dust and brake dust. These contaminants pierce paint finishes, glass and metal and remain stuck on your vehicle through rain, car washes, and even polishing. The only way to remove these pollutants is – you guessed it – Detailing Clay.
How Does Auto Detailing Clay Work?
Detailing Clay glides along the surface of your paint and grabs anything that protrudes from the surface. The particle sticks to the clay and is therefore removed from your vehicle. The surface being clayed should always be wet with clay lubricant to prevent loose debris from scratching the vehicle.
Used properly, detailing clay is completely safe and nonabrasive. It’s a much better option than polishing to remove these contaminants because clay doesn’t remove any paint.
 |
 |
There are two different grades of clay currently available to the public. One is a medium-grade Detailing Clay designed to clean the vehicle once or twice a year. This grade of clay removes wax along with anything else on the vehicle. We’re talking CLEAN. Examples are Wolfgang Elastic Poly Clay and McKee’s 37 Universal Detailing Clay.
Your other option is a fine-grade Detailing Clay that’s relatively new to the industry. It’s called Pinnacle Ultra Poly Clay and it’s a favorite of enthusiasts who prefer to clay as often as needed to keep that slick finish. This detailing clay removes everything the medium-grade clay removes and it is gentle enough to use monthly or as needed for spot cleaning. If you’re someone who’s meticulous about clean, shiny paint (and who isn’t?!) you’ll love Pinnacle Ultra Poly Clay.
All Detailing Clay requires the use of a clay lubricant to prevent scratches as you gently rub the clay on the vehicle. Check out our Clay Page. There you will find all of the different clays and their coordinated clay lubricants.
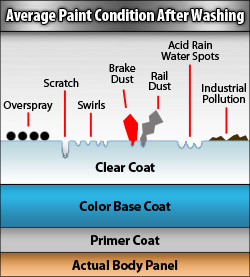
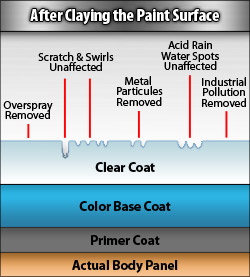
What Does Detailing Clay Remove?
Your vehicle is under constant assault from airborne pollutants. Brake dust, industrial fallout, acid rain deposits and rail dust all can adhere to your vehicle. These contaminants often contain metal particulates, which accounts for the ease with which they penetrate the clear coat to attack the paint below. These contaminants then oxidize, and they allow rust to spread beneath the clear coat. Tiny orange spots today, total paint system failure tomorrow! Detailing Clay removes these contaminants in order to keep the paint healthy and vibrant.
Detailing Clay also removes stubborn sap, tar, and bug remains. Detailing Clay works wonders on glass as well. Try some the next time you’re washing your windows. You’ll be amazed at the results!
Do You Need To Clay?
Chances are, the answer is yes. The surface of your vehicle faces assaults from the environment every time it’s out in the weather. Each road trip brings new insults from roadway debris, exhaust films, and airborne pollution. They will splash, mar, and embed themselves in that beautiful paint job you’ve labored over. Vehicles can accumulate these contaminants any time, any place – even at the dealership.
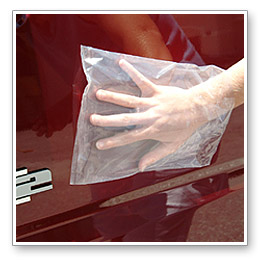
The Bag Test: There’s a simple test that will indicate whether or not you need to clay. Wash and dry your vehicle, put a plastic sandwich bag over your hand and lightly rub your fingertips over the paint. If it feels gritty or rough, your paint is contaminated.
Use a high quality Detailing Clay bar, like Wolfgang Elastic Poly Clay or Pinnacle Ultra Poly Clay, and a clay lubricant to clean your paint before applying wax or polish.
Waxes and paint sealants will adhere better to clean paint and the shine will be more uniform and vibrant. Sounds like a win-win situation!
To Use Clay:
Auto Detailing Clay is available in 2 to 8 oz. bars. Two ounces is enough to do three or four vehicles. On average, a vehicle will need to be clayed twice a year. At this rate, one 2 oz. clay bar will last you 18 months to 2 years if used on the same vehicle. If you buy clay in an 4 oz. bar, like McKee’s 37 Universal Detailing Clay or BLACKFIRE Poly Clay, cut it in half and keep the unused portions moistened with lubricant in the storage case.
NOTE: To optimize both the quality of your claying and the clay’s useful life, avoid soap and water as a lubricant. They will prematurely deteriorate today’s clay compounds. Use only clay lubricants. A good clay kit, like the The Wolfgang Polishin’ Pal Clay Kit, contain both the Detailing Clay and its corresponding lubricant.
Follow these steps:
1. Wash and dry your vehicle.
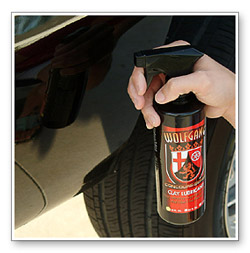
2. Spray a small area with clay lubricant, no bigger than 2 square feet.
 |
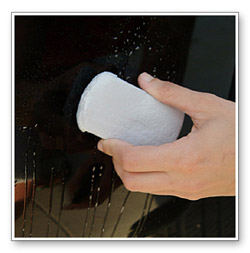
3. Gently rub the clay bar back and forth across the wet area. It will grab at first. This means that it is pulling contaminants out of the paint. When it glides freely, the paint is clean.
 |
4. Wipe the area with a microfiber towel and use the clay lubricant to remove any clay residue. Rub your fingers across the paint now; it should be as smooth as glass. If it’s not, repeat the process. Reshape the clay bar as needed to expose a clean surface. Keep the clay well-lubricated.
5. Continue these steps until you’ve clayed the entire vehicle. Clay does a marvelous job on glass and chrome, too.
6. Store the clay bar in its original case if possible, or in an airtight plastic bag. Spray it with lubricant to keep it moist. Do not allow the clay to freeze and do not store it in temperatures above 200°F.
7. Always follow claying with a wax or sealant. Clay will removing existing wax and may leave tiny holes where contaminants have been removed. They must be sealed in order to protect the paint from corrosion.
NOTE: Detailing Clay does not remove oxidized paint or fill in blemishes. If your paint is mildly oxidized, clean the paint with clay and then use a polish to remove the oxidized paint. If the oxidation is severe, polish first because the oxidized paint may flake off as you clay and ruin the clay bar. (See our polish how-to.)